Installation of the VESC2X3Bridge and LightBoard
Materials needed
- Double-sided tape
- Enough space :)
- Battery-voltage-to-12V, 5A DC-DC converter
DC DC Converter I use
DC DC Converter Isolation stabilized power supply
The 5A version is recommended, especially for GT3.
- For 13s, use the 30-60V option.
- For 16s to 22s (safe), use the 50-100V option.
- For 24s to 34s (safe), use the 75-150V option (currently using this one).
Preparing the VESC2X3Bridge and LightBoard
On the VESC2X3Bridge, you have different connectors, and each one serves a purpose.
| Amount | PCB marking | Connector name | Connector link | Cable name | Cable link |
|---|---|---|---|---|---|
| 2x | Light_12V | JST BM04B-GHS-TBT | AliExpress | JST GH 1,25 4P Opposite direction | AliExpress |
| 2x | Canbus | JST BM05B-GHS-TBT | AliExpress | JST GH 1,25 5P Opposite direction | AliExpress |
| 3x | Hall Sensor, LightBoard_Main | JST BM06B-GHS-TBT | AliExpress | JST GH 1,25 6P Opposite direction | AliExpress |
| 1x | Ignition | JST BM07B-GHS-TBT | AliExpress | JST GH 1,25 7P Opposite direction | AliExpress |
Connection diagram
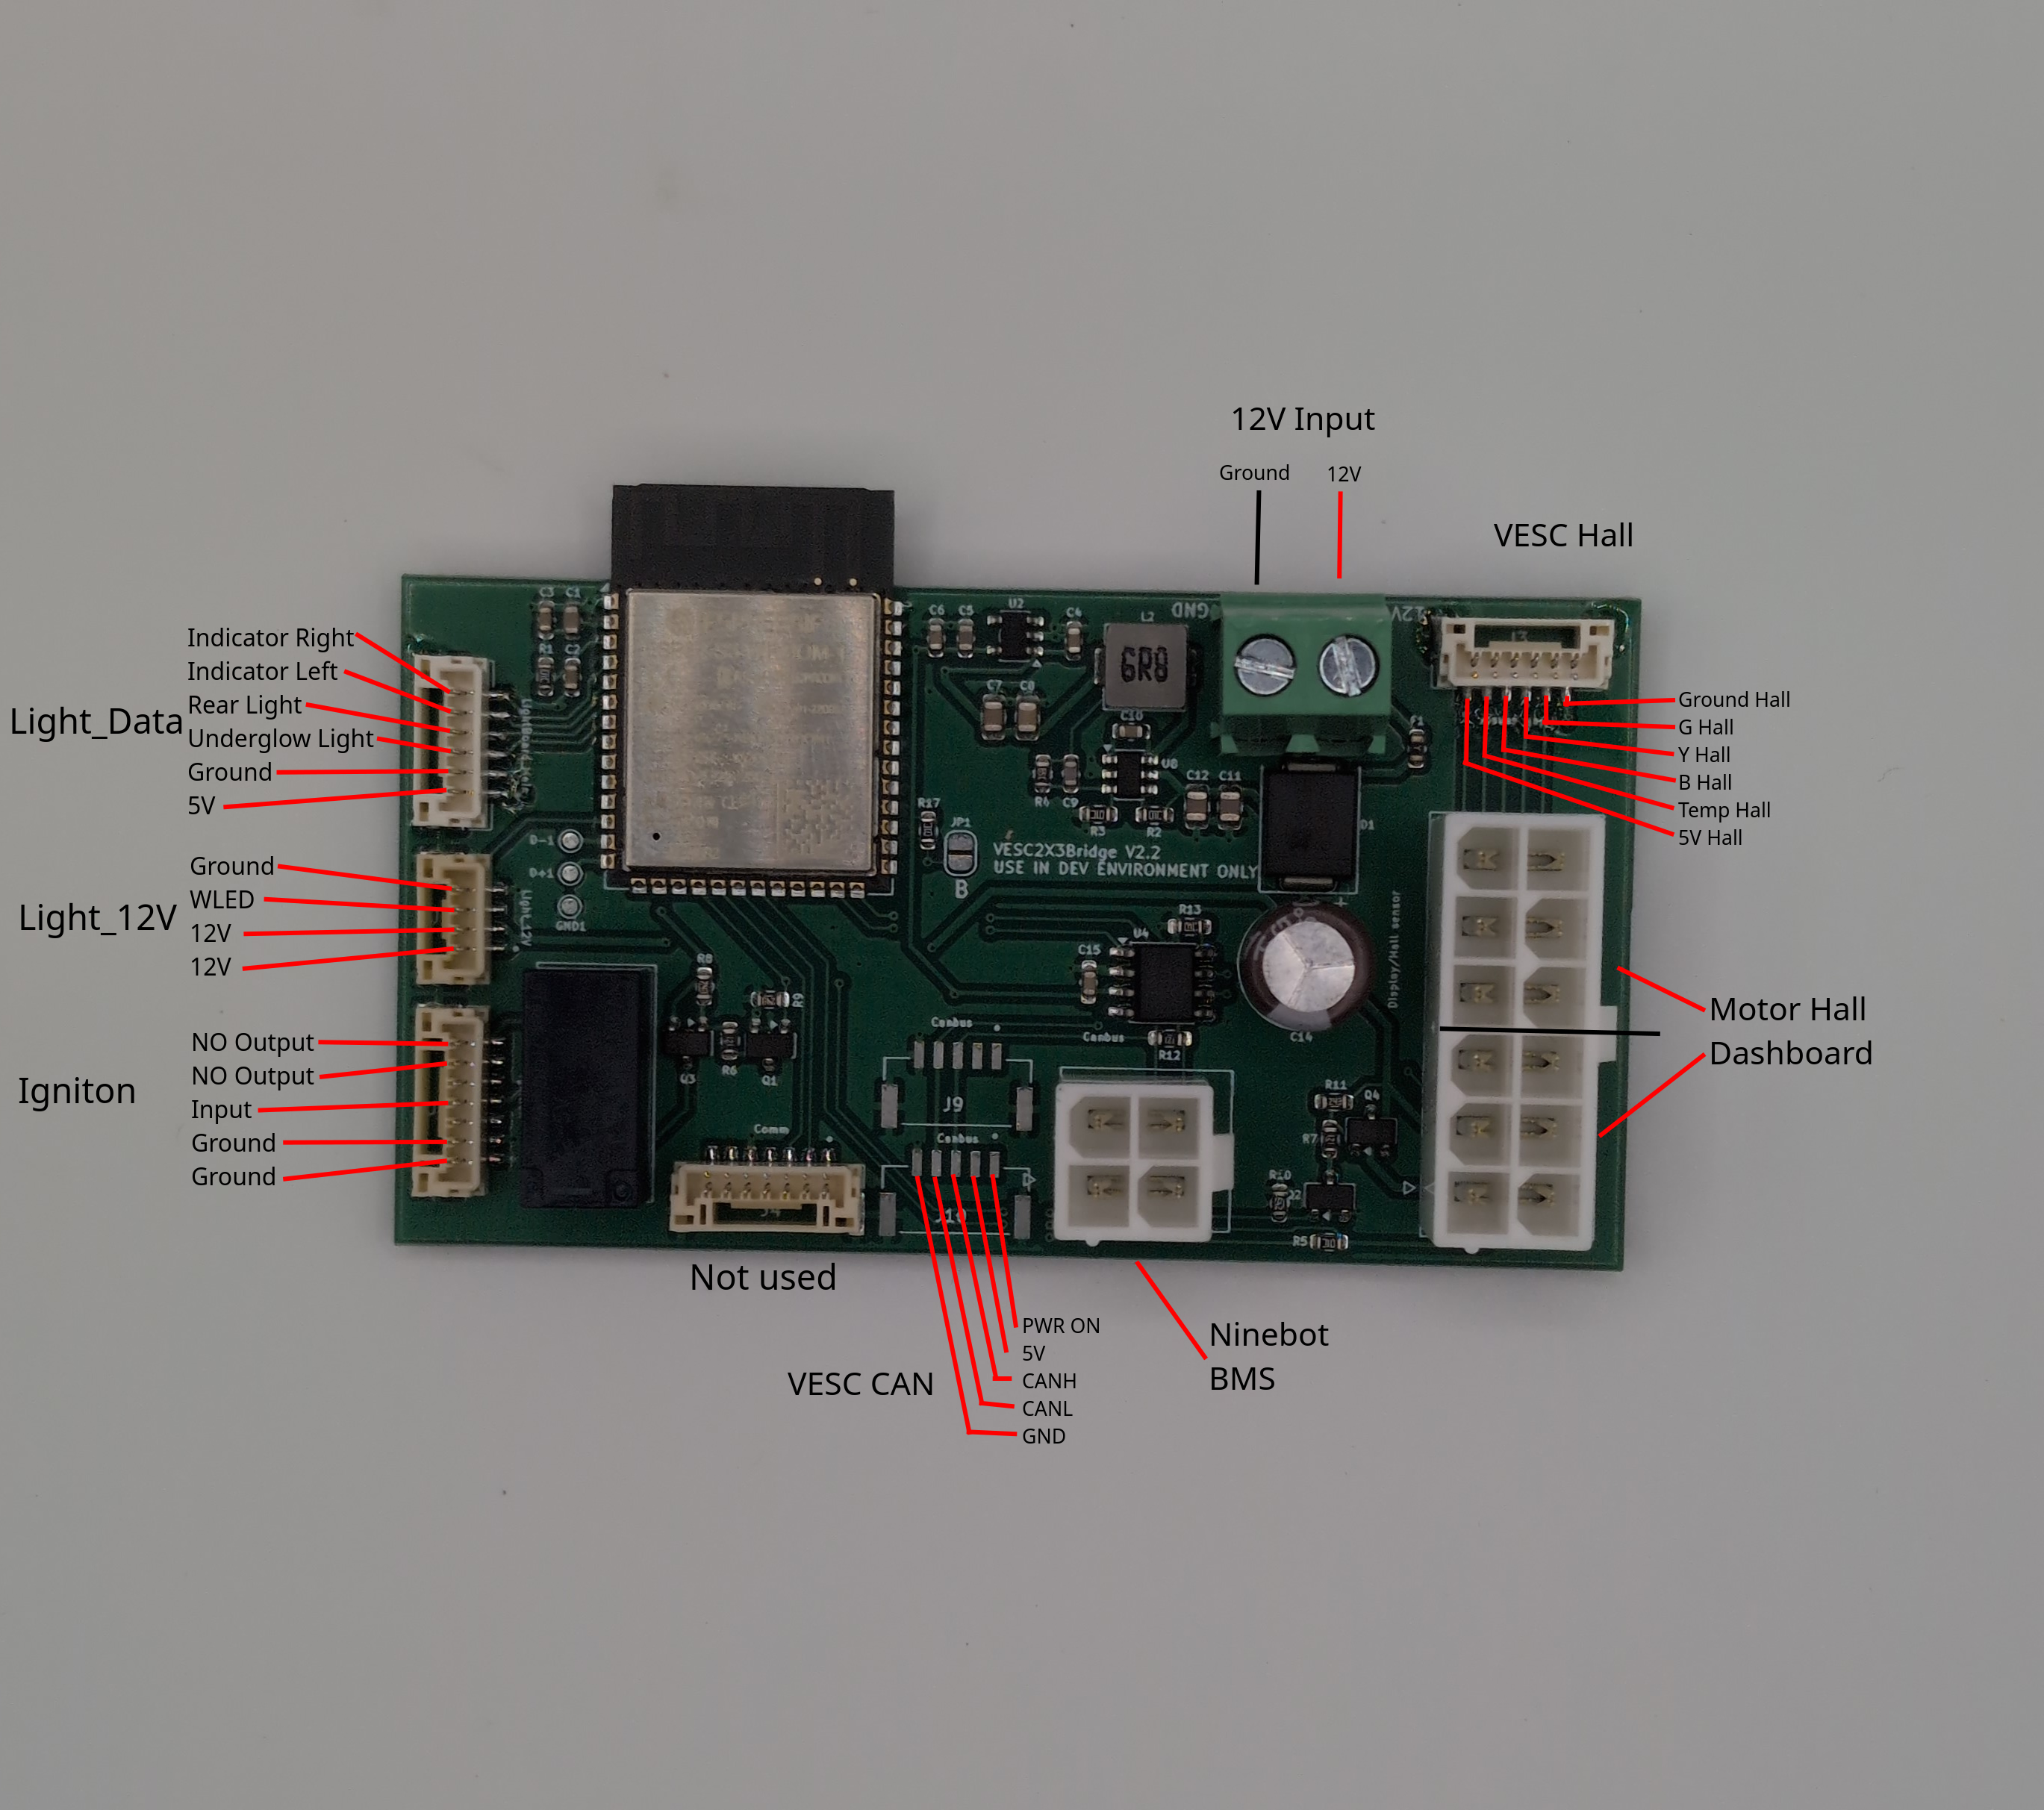
Pinout of the VESC2X3Bridge V2.2

VESC2X3Bridge connected to a Spintend UBOX 100V 100A
Installation video
This video is still in progress and is currently unavailable. A written step-by-step section will be added as fallback in a future update.